Getting Started
A step-by-step guide to get AI Proxy running.
Related:
- Configuration Guide - All environment variables
- Dashboard Guide - Visual monitoring tour
- Troubleshooting - Common issues and solutions
- Z.ai Documentation - Tier limits and pricing
New to this? Start with the README.md for a quick overview, then come back here for detailed instructions.
What You’ll Need
Before starting, make sure you have:
| Requirement | How to Check | Where to Get It |
|---|---|---|
| Node.js 18+ | Run node --version |
nodejs.org |
| A code/text editor | Any editor works | VS Code, Notepad++, etc. |
| API keys | N/A | Z.AI Dashboard |
| Terminal access | N/A | Terminal (Mac/Linux), Command Prompt or PowerShell (Windows) |
Step-by-Step Setup
Step 1: Get the Code
Option A: Using Git (recommended)
git clone https://github.com/RicherTunes/ai-proxy.git
cd ai-proxy
Option B: Download ZIP
- Go to GitHub
- Click “Code” → “Download ZIP”
- Extract the ZIP file
- Open terminal in the extracted folder
Step 2: Install Dependencies
npm install
This downloads everything the proxy needs. It may take 1-2 minutes.
What if this fails?
- Make sure Node.js is installed:
node --version - Try deleting
node_modulesfolder and runningnpm installagain - Check your internet connection
Step 3: Get Your API Keys
- Log in to your Z.AI dashboard
- Go to “API Keys” section
- Create one or more API keys
- Copy each key (they look like:
key_abc123.secret_xyz789)
Tip: Having multiple keys lets the proxy spread requests across them, giving you higher rate limits.
Documentation:
- Z.ai Coding Subscription Reference - Quick tier comparisons and limits
- Z.ai Knowledge Base - Comprehensive model specs, integrations, and troubleshooting
Step 4: Create Your Configuration File
Create a file named api-keys.json in the project folder:
{
  "keys": [
    "your-first-key-id.your-first-secret",
    "your-second-key-id.your-second-secret"
  ],
  "baseUrl": "https://api.z.ai/api/anthropic"
}
For API keys configuration format and advanced options, see Configuration Guide - api-keys.json Format.
Common mistakes:
- ❌ Missing comma between keys
- ❌ Extra comma after the last key
- ❌ Using the wrong quotes (must be
"not') - ❌ Forgetting to include the
baseUrl
Step 5: Start the Proxy
npm start
You should see:
[INFO] GLM Proxy starting...
[INFO] Loaded 2 API keys from api-keys.json
[INFO] Dashboard available at http://127.0.0.1:18765/dashboard
[INFO] Server listening on http://127.0.0.1:18765
What is
127.0.0.1:18765?This is the address where your proxy is running:
127.0.0.1= “localhost” (means “your own computer”)18765= the port number (like a door number)- Together = “Connect to my computer on door 18765”
You can open this address in your browser to see the dashboard!
If you see errors:
Cannot find module: Runnpm installagainENOENT: no such file: Check thatapi-keys.jsonexistsInvalid JSON: Check your JSON syntax (use a JSON validator)
Step 6: Verify It’s Working
Check the health endpoint:
curl http://127.0.0.1:18765/health
What is
curl?
curlis a command-line tool for making web requests. It’s like a browser, but for your terminal.What is an “endpoint”?
An endpoint is a specific URL path that does something.
/healthis an endpoint that tells you if the proxy is running correctly.
Expected response:
{
  "status": "OK",
  "healthyKeys": 2,
  "totalKeys": 2
}
Or open the dashboard: Go to http://127.0.0.1:18765/dashboard in your browser. You should see your keys listed.
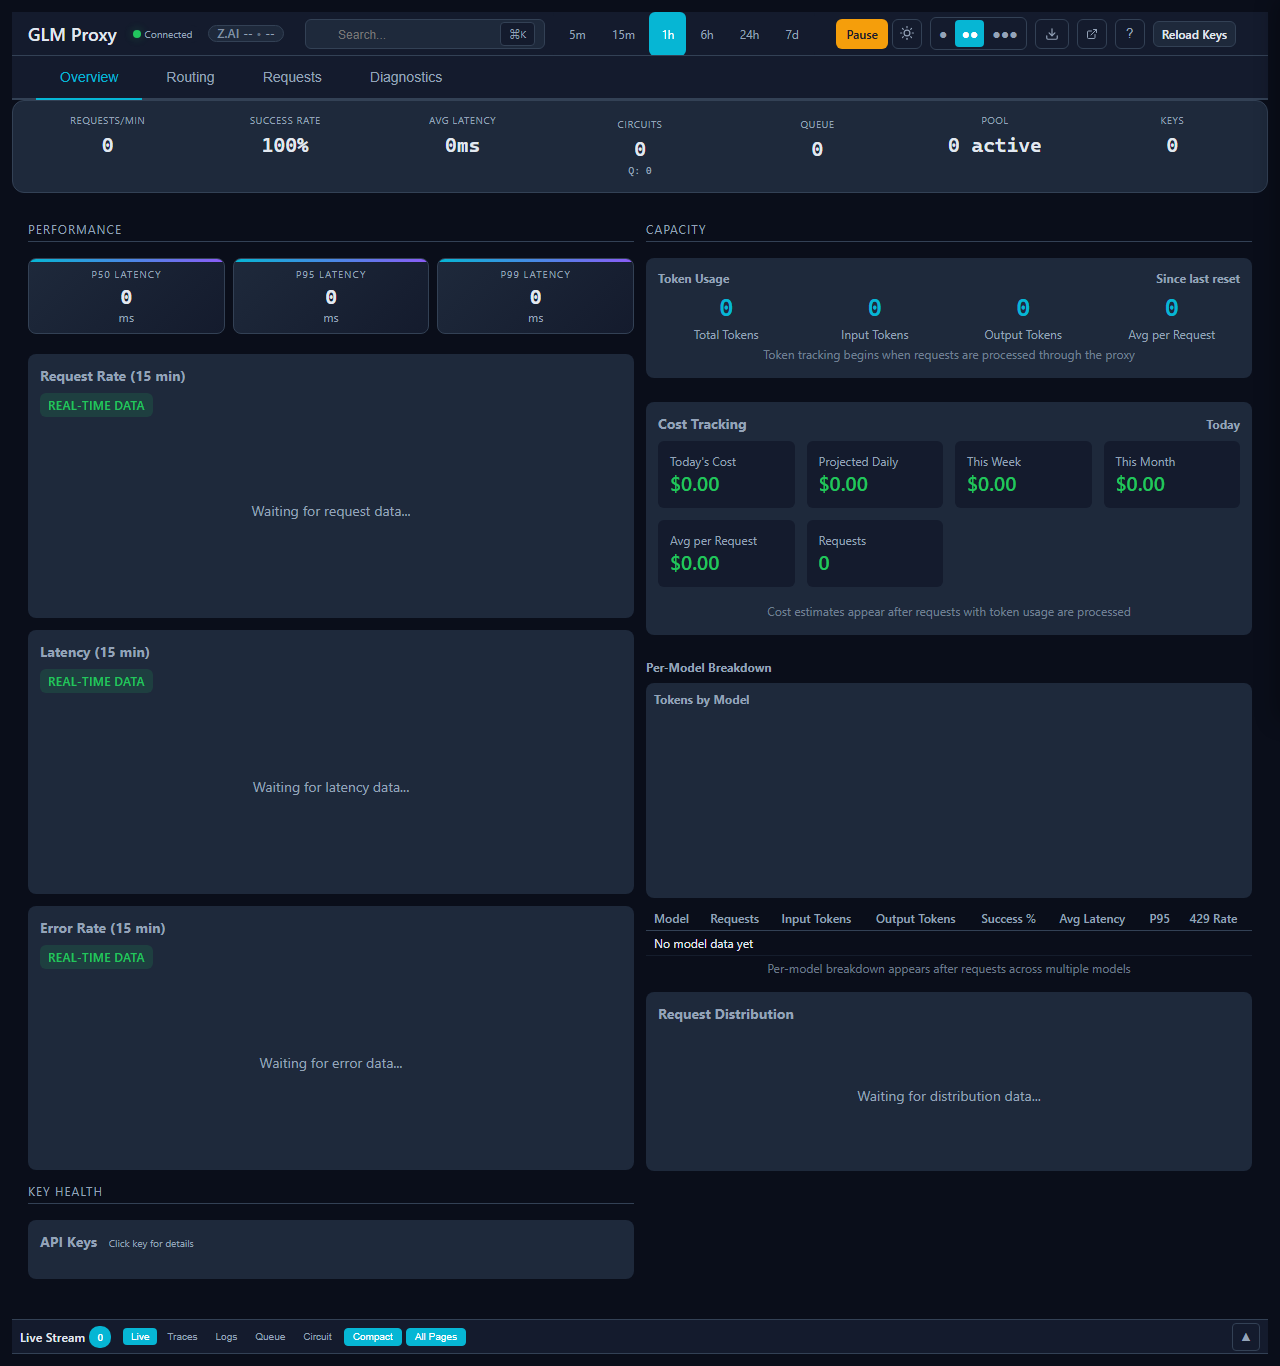
The dashboard shows your keys’ health status using a color-coded heatmap:

- Green = Healthy key
- Yellow = Warning (some issues)
- Red = Failing or circuit-broken
You can also see real-time connection status and control the proxy:


See the Dashboard Guide for a complete visual tour of all dashboard features.
Step 7: Connect Your Application
Now configure your application to use the proxy:
What is an environment variable?
An environment variable is a setting that your computer or applications can read. It’s like a configuration file, but set as part of your system’s environment. Here, we’re telling applications to use the proxy instead of connecting directly to the API.
For Claude Code CLI:
# Mac/Linux
export ANTHROPIC_BASE_URL=http://127.0.0.1:18765

# Windows PowerShell
$env:ANTHROPIC_BASE_URL="http://127.0.0.1:18765"

# Windows Command Prompt
set ANTHROPIC_BASE_URL=http://127.0.0.1:18765
For Python applications:
import anthropic

client = anthropic.Anthropic(
    base_url="http://127.0.0.1:18765"
)
For other applications:
Just change the API endpoint URL from the default to http://127.0.0.1:18765.
Testing Your Setup
Send a test request to make sure everything works:
curl http://127.0.0.1:18765/v1/messages \
  -H "Content-Type: application/json" \
  -H "x-api-key: any-value-works" \
  -H "anthropic-version: 2023-06-01" \
  -d '{"model": "claude-sonnet-4-20250514", "max_tokens": 10, "messages": [{"role": "user", "content": "Hi"}]}'
If successful, you’ll see a response from the AI model.
Next Steps
- Configuration — Customize settings for your needs
- Monitoring — Learn about health checks and stats
- Troubleshooting — Solve common problems
Need Help?
- Check the Troubleshooting Guide
- Look at the dashboard for error messages
- Check the terminal output for logs
- Open a GitHub issue with your error message
See Also
- Configuration Guide — Complete environment variable reference
- Monitoring Guide — Health checks, stats, and metrics
- Dashboard Guide — Visual tour of dashboard features
- README.md — Project overview and features